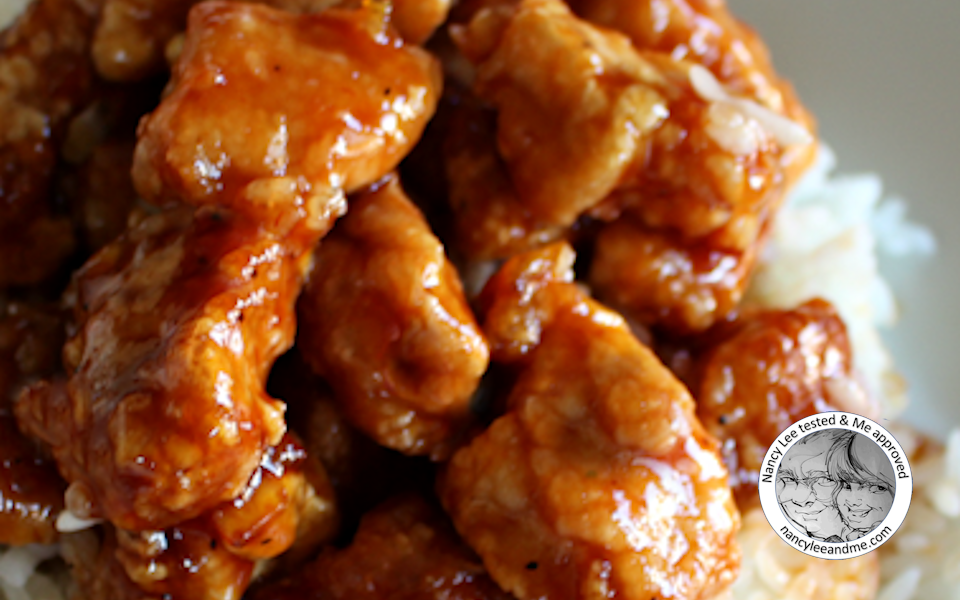
We tried this recipe and it was the best tasting Orange Chicken. Better than most restaurants. You won’t go wrong with the recipe.
Origin
The variety of orange chicken most commonly found at North American Chinese restaurants consists of chopped, battered and fried chicken pieces coated in a sweet orange-flavored chili sauce, which thickens or caramelizes to a glaze. While the dish is very popular in the United States, it is most often found as a variation of General Tso’s chicken in North America rather than the dish found in mainland China.
In a sauce pan, add the BBQ sauce, marmalade, and soy sauce. Turn the heat on low and let it simmer for 20 minutes, stirring a few times.
Meanwhile, cut up your chicken breasts into cubes. In one bowl beat 1 eggs, while in the other bowl place the flour. This can be done in a ziploc bag also.
Dip pieces of chicken in the egg and then cover in flour. Set on an extra plate.
Add a thin layer of oil to a frying pan and turn your stove on medium/high heat. Once it sizzles, add the chicken to the pan. Let it cook for 3-5 minutes each side until it's brown and cooked on the inside.
Set the oily pieces on a paper towel and let drain.
Add the chicken to the sauce and toss!
Eat it on top of white rice and enjoy. I think veggies would be good with it such as green peppers or broccoli, voila, dinner!
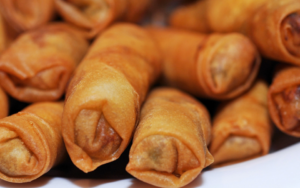
Lumpia are Filipino fried spring rolls filled with ground pork and mixed vegetables. Serve them as an appetizer or finger food, with a sweet and sour dipping sauce.
Lumpia was introduced to the Philippines during the pre-colonial period by early Hokkien immigrants and traders from Fujian between 900 and 1565 AD. The name is derived from Hokkien, a language that originated in southeastern China: “lun” means wet, moist, or soft, and “pia” means cake or pastry.
Lumpia are Filipino fried spring rolls filled with ground pork and mixed vegetables. Serve them as an appetizer or finger food, with a sweet and sour dipping sauce.
1pkgLumpia wrappersChinese or Vietnamese spring roll wrappers meant for frying can be used
2lbsground pork
1inchgingerpeeled and minced
2tbspsoy sauce
2largeeggsslightly beaten
3dashesblack pepper
6ozcabbagethinly sliced
Instructions
Using a serrated knife, cut the square lumpia wrappers in half so that you have two stacks of rectangular wrappers. Place a damp paper towel over the wrappers to keep them from drying out as you work.
Combine the pork, cabbage, garlic, ginger, soy sauce, eggs, and black pepper in a large bowl. Using your hands, or a rubber spatula, mix the filling well so that the seasonings are evenly distributed.
Place one of the rectangular wrappers vertically on your work surface with the short edge facing you. Place a heaping teaspoon of the filling on the wrapper about half an inch from the edge closest to you. Grasp the bottom edge of the wrapper and roll it up and over the filling, continuing to roll until 2 inches of wrapper remain.
Dip two fingers into a bowl of water, then moisten the last 2 inches of wrapper with your fingers. Finish rolling the lumpia, then rest it on its seam. Continue rolling with the rest of the filling and lumpia wrappers.
At this point, you can freeze your rolled lumpia if you wish by placing them in freezer bags and then into your freezer.
To cook the lumpia, fill a large frying pan with about 1/2-inch of vegetable oil. Heat the oil over medium-high heat. Gently place the lumpia into the hot oil and fry until golden brown on all sides, 3 to 5 minutes total (if frying frozen lumpia, it will take 1 to 2 minutes longer).
Place the fried lumpia on paper towels and serve immediately with sweet and sour sauce (bottled from the store is fine).
Notes
You can also add finely minced raw shrimp to the pork mixture if you’d like. Also, instead of ground pork, you can use ground beef or ground turkey.
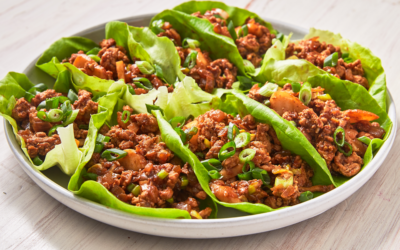
As you probably would have guessed, like most chain-restaurant, Americanized versions of Chinese dishes, PF Chang’s wraps aren’t totally authentic or traditional. However, they’re not as far off as you might think, and a lettuce wrap actually are believed to be Chinese in origin.
While wraps originated in China, they’ve since migrated throughout Southeast Asia, and they’re especially popular in Laos and Thailand. Which brings us to Larb, an uber-popular meat salad from Laos and Thailand, and my personal favorite variety of wrap filler.
PF Chang Lettuce Wrap (NOLOW)
The chicken lettuce wraps! The perfectly seasoned chicken – those crunchy water chestnuts are a game changer!
Heat oil in a large pan or skillet over medium-high heat and cook chicken until browned on all sides. 5-7 minutes.
Drain fat, then add onions and cook until translucent. 4-5 minutes. Season generously with salt and pepper, then add garlic and ginger and cook for another 1 minute, or until fragrant.
Stir in hoisin sauce, soy sauce, rice wine vinegar, sriracha and red pepper flakes, if using, and cook for another 2-3 minutes, giving flavors a chance to blend.
Mix in diced water chestnuts and green onions, then taste and adjust seasoning, if necessary.
Serve with butter lettuce, scooping chicken mixture into lettuce “bowls.” Enjoy!
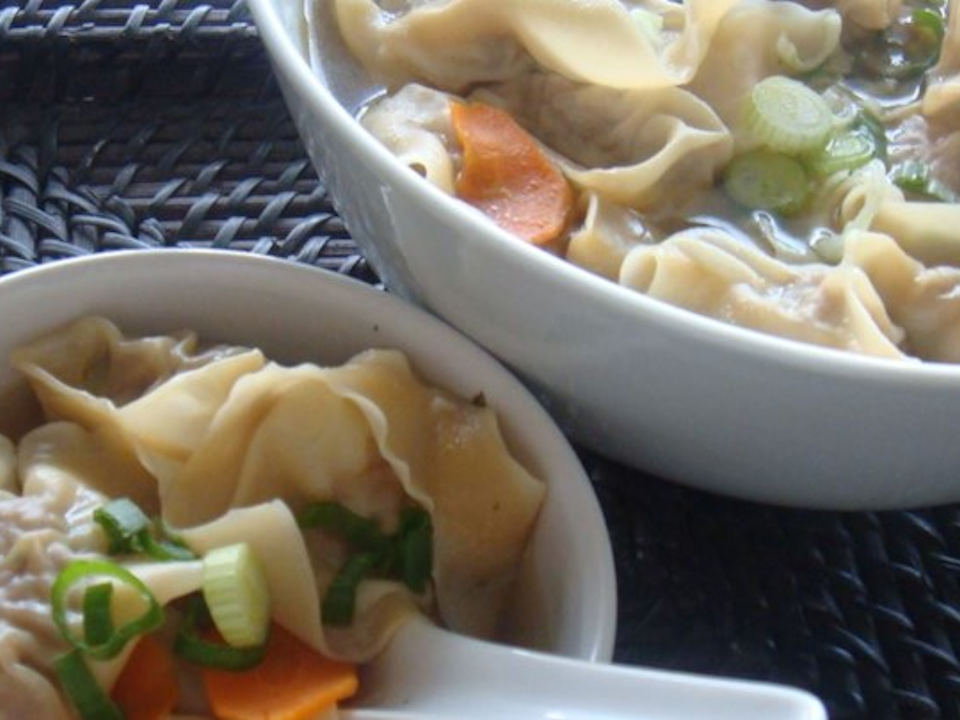
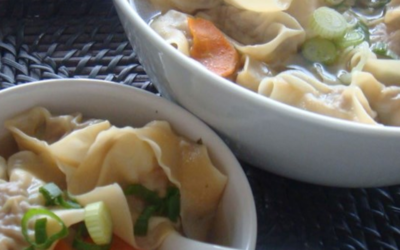
Wor Wonton Soup – Chinese dumpling classic, whether in soup or fried, wontons will always bring you that mysteriously delicious taste of the Far East! Garnish with fresh scallions.
Wontons originate from China, with evidence of its existence going as far back as the Qing Dynasty (1644). Wonton soup was enjoyed by the rich, upper class families but after World War II, it became more widespread. As the economy improved after the war, the dish moved to Hong Kong, where many hawker stalls opened up to serve the dish to the working class. Due to it’s popularity, some variations of wonton include medicinal ingredients as a way to serve it to those who may not enjoy the strong taste of medicine. In Cantonese, ‘wonton’ roughly translates to ‘clouds’ – as the wontons look like clouds floating in the soup.
Wor Wonton Soup
This is really easy to make and you can make this your entire meal.
In a large bowl, combine pork, shrimp, sugar, wine, soy sauce, 1 teaspoon chopped green onion and ginger. Blend well, and let stand for 25 to 30 minutes.
Place about one teaspoon of the filling at the center of each wonton skin. Moisten all 4 edges of wonton wrapper with water, then pull the top corner down to the bottom, folding the wrapper over the filling to make a triangle. Press edges firmly to make a seal. Bring left and right corners together above the filling. Overlap the tips of these corners, moisten with water and press together. Continue until all wrappers are used.
FOR SOUP: Bring the chicken stock to a rolling boil. Drop wontons in, and cook for 5 minutes. Garnish with chopped green onion, and serve.
Notes
Uncooked wontons will keep in freezer for a good 2 months if well wrapped. Thaw before frying, but they can be boiled straight from frozen and cooked 2 minutes longer.)
TO FRY: Heat 2 to 3 cups of oil in a wok until hot. Deep-fry wontons in batches until golden, 2 to 3 minutes on each side. Drain. Serve with dipping sauce or duck sauce, also called plum sauce.
Vegetable Egg Foo Young – If you’ve enjoyed this dish in Chinese restaurants, use this recipe to recreate the dish at home. While not traditionally Chinese, it has long appealed to the American palate and it remains a great choice as a simple family dinner.
The egg foo young origin story is said to go back to the southern Chinese coastal province of Guangdong, formerly known as Canton. The dish can now be found as a Cantonese hybrid not only in this country, but across Asia too.
To make the egg foo yung sauce, bring the chicken broth to a boil over medium heat. Stir in the soy sauce, rice wine (or sherry), sesame oil, and pepper to taste. Turn up the heat slightly and add the dissolved cornstarch-water mixture, stirring quickly to thicken.
Move the saucepan to another burner and keep warm on low heat while preparing the egg foo yung omelet.
Making the Egg Fu Yung
Rinse and dry mushrooms slice and put aside
Rinse the bean sprouts, shred the cabbage, and put aside.
If desired, you can blanch the vegetables so they will be more tender—just be sure to drain them thoroughly.
In a medium bowl, lightly beat the eggs with the salt, freshly ground black pepper, and the rice wine or sherry and put aside.
Heat 1 tablespoon oil in a wok or frying pan over medium heat. When the oil is hot, add the onion. Stir fry for 2 minutes, then remove from the pan with a slotted spoon and put aside.
Add 1 more tablespoon of oil, and stir-fry the reserved mushrooms until they're browned. Remove from the pan and put aside.
Add the cooked onion, and mushrooms to the reserved egg mixture, along with the bean sprouts and cabbage.
Add the remaining 1 tablespoon of oil to the pan. Using a spatula push egg mixture towards center of pan making a smaller circle. Cook for 2-3 minutes and flip. Cook for another 2 minutes.
Then turn over and cook the other side until golden brown. Repeat until all mixture is used.
Serve hot with the warmed sauce poured over the top.
Notes
if desired, and more Asian vegetables like stir-fried pea pods.From: thesprueeats.com
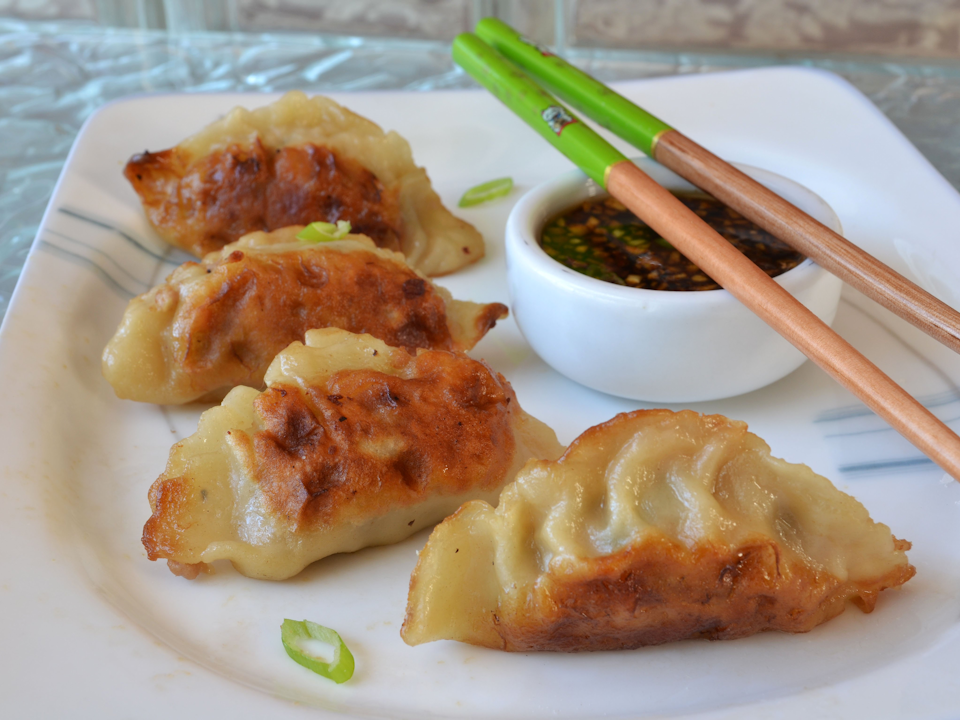
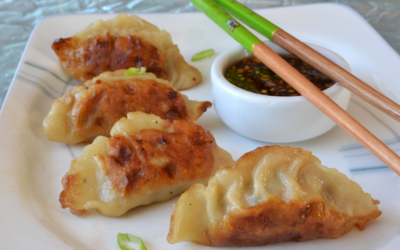
Homemade pot stickers are so versatile–you can fill them with anything you want and as full as you want. And the play between the crispy, crusty bottom, and the tender parts, makes for a truly unique dumpling. These are filled with ground pork, green onions, ginger, and cabbage.
Like most foods that have been around for centuries, we’re not exactly 100% certain how potstickers came to be. So while we do know that the actual potsticker origin can be traced back all the way to the Chinese Song dynasty (960 to 1280 A.D.), who invented them and why remains a mystery for the ages
Place ground pork, green onions, garlic, ginger, 2 tablespoon plus 1 teaspoon soy sauce, sesame oil, and cayenne in a mixing bowl. Top with chopped green cabbage. Mix with fork until thoroughly combined. Tamp down lightly; cover with plastic. Refrigerate until chilled, about an hour.
Place flour and kosher salt in a mixing bowl. Slowly pour in hot water. Stir with a wooden spoon until mixture forms a shaggy dough. Flour your hands and transfer dough to a work surface. Knead dough until it becomes smooth and elastic. If dough seems too sticky, sprinkle with a bit more flour, about 3 to 5 minutes. Wrap dough ball in plastic, and let it rest about 30 minutes.
When dough has rested, divide into 4 equal pieces. Cover 3 pieces with a dish cloth while you work the first piece. Roll into a small log about the thickness of a thumb, about 3/4 inch. Divide each log into 6 equal pieces. Roll each piece into a thin 3 1/2-inch circle on a lightly floured surface to form the pot sticker wrappers. Repeat with the remaining dough pieces.
Lightly moisten the edges of a wrapper with your wet finger. Place a small scoop of the ground pork mixture onto the center of a wrapper. Fold up the 2 sides and pinch together in the center. Pinch together the remaining edges, forming "pleats" along one side. Tap the pot sticker on the work surface to slightly flatten the bottom; form a slight curve in it so it stands upright in the pan. Transfer to a well-floured plate. Repeat with remaining dough and filling.
Mix together seasoned rice vinegar and soy sauce in a small mixing bowl for the dipping sauce.
Heat oil in skillet over medium-high heat. Place about 6 or 7 pot stickers in the hot oil, flat side down. Cook until bottoms are golden brown, about 2 minutes. Drizzle in water and quickly cover the pan; steam for 3 minutes. Uncover; reduce heat to medium. Continue cooking until water evaporates and bottoms are browned and crunchy, 1 or 2 minutes. Transfer to a warm serving dish. Repeat with remaining pot stickers. Serve with dipping sauce.
Notes
You can spike dipping sauce with things like hot sauce, garlic, minced green onions, ginger, etc.From Allrecipes.com