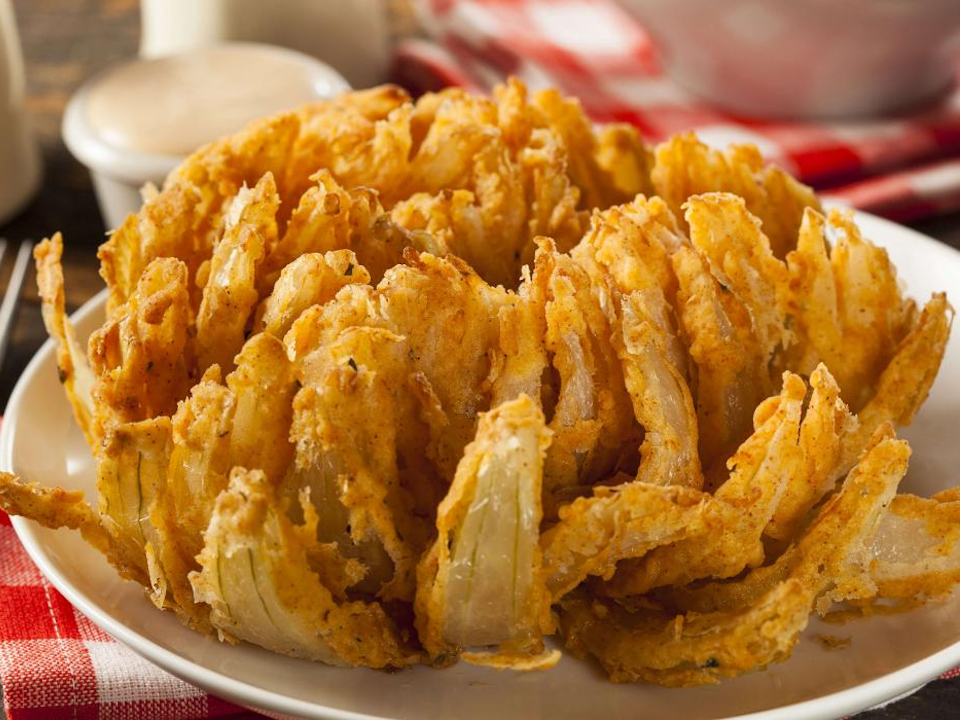
NON Fried Blooming Onion – It’s crazy crispy and so fun as a pull-apart shared appetizer. The secret sauce from Outback will forever be our favorite dip!
The blooming onion was probably invented in the mid 1980s in New Orleans, a city no stranger to ultra-rich fried foods, at Russell’s Marina Grill, where it still goes by the name of “onion mum.” The founder of Outback Steakhouse worked at Russell’s at the time.
Keyword: air fried blooming onion, blooming onion, onion
Prep Time: 15 minutesminutes
Cook Time: 45 minutesminutes
Total Time: 1 hourhour
Servings: 4
Calories: 454kcal
Author: Nancy Lee
Ingredients
1largeyellow onion
3largeeggs
1cupbread crumbs
2tsppaprika
1tspgarlic powder
1tsponion powder
1tspkosher salt
dipping sauce
2/3cupmayonnaise
2tbspkatchup
1tsphorseradish
1/2tsppaprika
1/2tspgarlic powder
1/2tspdried oregano
kosher salt
Instructions
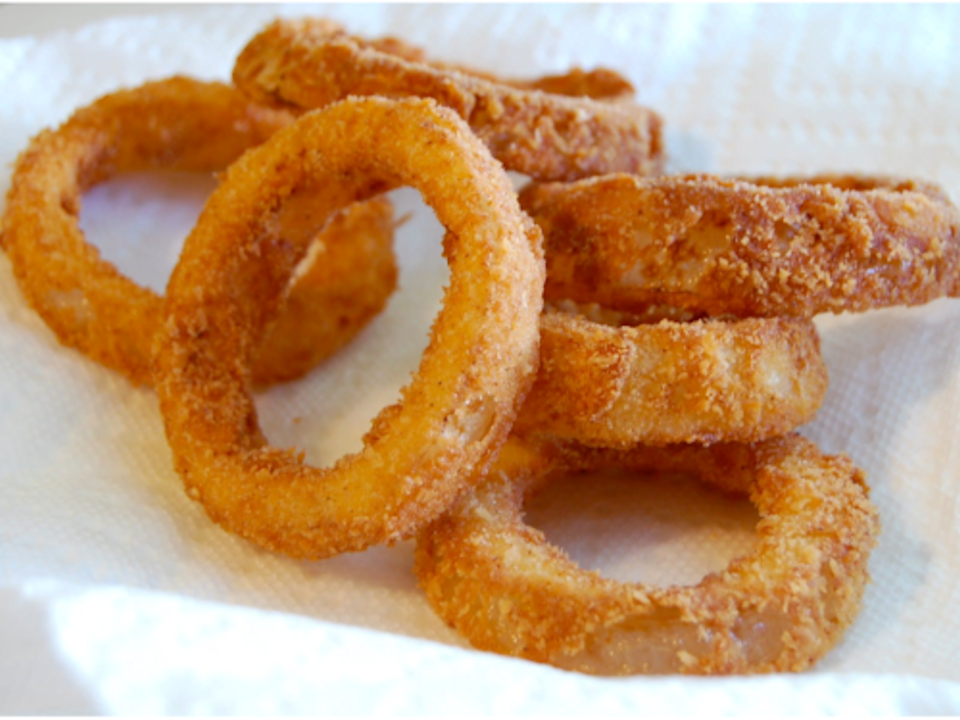
Slice off onion stem and set onion on flat side. Cut an inch from the root down, into 12 to 16 sections, being careful not to cut all the way through.
Put the onion into an iced water bath for 2 minutes, carefully spread the onion petals apart and away from the center.
In a shallow bowl, whisk together eggs and 1 tablespoon water. In another shallow bowl, whisk together breadcrumbs and spices. Dip onion into egg wash, then dredge in breadcrumb mixture, using a spoon to fully coat.
Place in basket of air fryer and cook at 375° for 20 minutes. (See baking method in notes below.)
Meanwhile make sauce: In a medium bowl, whisk together mayonnaise, ketchup, horseradish, paprika, garlic powder, and dried oregano. Season with salt.
Notes
NOTE there is a baking option also. Preheat your oven to 400 degrees. Set onion on prepared baking sheet and bake until golden and tender, 18 to 20 minutes.
Vegetable Egg Foo Young – If you’ve enjoyed this dish in Chinese restaurants, use this recipe to recreate the dish at home. While not traditionally Chinese, it has long appealed to the American palate and it remains a great choice as a simple family dinner.
The egg foo young origin story is said to go back to the southern Chinese coastal province of Guangdong, formerly known as Canton. The dish can now be found as a Cantonese hybrid not only in this country, but across Asia too.
To make the egg foo yung sauce, bring the chicken broth to a boil over medium heat. Stir in the soy sauce, rice wine (or sherry), sesame oil, and pepper to taste. Turn up the heat slightly and add the dissolved cornstarch-water mixture, stirring quickly to thicken.
Move the saucepan to another burner and keep warm on low heat while preparing the egg foo yung omelet.
Making the Egg Fu Yung
Rinse and dry mushrooms slice and put aside
Rinse the bean sprouts, shred the cabbage, and put aside.
If desired, you can blanch the vegetables so they will be more tender—just be sure to drain them thoroughly.
In a medium bowl, lightly beat the eggs with the salt, freshly ground black pepper, and the rice wine or sherry and put aside.
Heat 1 tablespoon oil in a wok or frying pan over medium heat. When the oil is hot, add the onion. Stir fry for 2 minutes, then remove from the pan with a slotted spoon and put aside.
Add 1 more tablespoon of oil, and stir-fry the reserved mushrooms until they're browned. Remove from the pan and put aside.
Add the cooked onion, and mushrooms to the reserved egg mixture, along with the bean sprouts and cabbage.
Add the remaining 1 tablespoon of oil to the pan. Using a spatula push egg mixture towards center of pan making a smaller circle. Cook for 2-3 minutes and flip. Cook for another 2 minutes.
Then turn over and cook the other side until golden brown. Repeat until all mixture is used.
Serve hot with the warmed sauce poured over the top.
Notes
if desired, and more Asian vegetables like stir-fried pea pods.From: thesprueeats.com
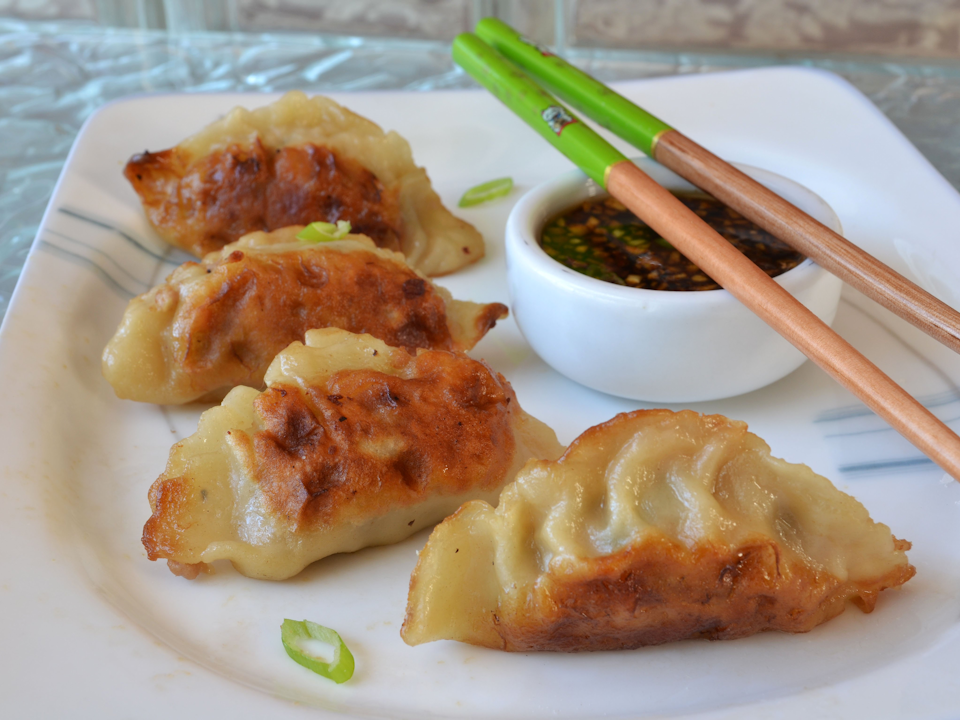
Homemade pot stickers are so versatile–you can fill them with anything you want and as full as you want. And the play between the crispy, crusty bottom, and the tender parts, makes for a truly unique dumpling. These are filled with ground pork, green onions, ginger, and cabbage.
Like most foods that have been around for centuries, we’re not exactly 100% certain how potstickers came to be. So while we do know that the actual potsticker origin can be traced back all the way to the Chinese Song dynasty (960 to 1280 A.D.), who invented them and why remains a mystery for the ages
Place ground pork, green onions, garlic, ginger, 2 tablespoon plus 1 teaspoon soy sauce, sesame oil, and cayenne in a mixing bowl. Top with chopped green cabbage. Mix with fork until thoroughly combined. Tamp down lightly; cover with plastic. Refrigerate until chilled, about an hour.
Place flour and kosher salt in a mixing bowl. Slowly pour in hot water. Stir with a wooden spoon until mixture forms a shaggy dough. Flour your hands and transfer dough to a work surface. Knead dough until it becomes smooth and elastic. If dough seems too sticky, sprinkle with a bit more flour, about 3 to 5 minutes. Wrap dough ball in plastic, and let it rest about 30 minutes.
When dough has rested, divide into 4 equal pieces. Cover 3 pieces with a dish cloth while you work the first piece. Roll into a small log about the thickness of a thumb, about 3/4 inch. Divide each log into 6 equal pieces. Roll each piece into a thin 3 1/2-inch circle on a lightly floured surface to form the pot sticker wrappers. Repeat with the remaining dough pieces.
Lightly moisten the edges of a wrapper with your wet finger. Place a small scoop of the ground pork mixture onto the center of a wrapper. Fold up the 2 sides and pinch together in the center. Pinch together the remaining edges, forming "pleats" along one side. Tap the pot sticker on the work surface to slightly flatten the bottom; form a slight curve in it so it stands upright in the pan. Transfer to a well-floured plate. Repeat with remaining dough and filling.
Mix together seasoned rice vinegar and soy sauce in a small mixing bowl for the dipping sauce.
Heat oil in skillet over medium-high heat. Place about 6 or 7 pot stickers in the hot oil, flat side down. Cook until bottoms are golden brown, about 2 minutes. Drizzle in water and quickly cover the pan; steam for 3 minutes. Uncover; reduce heat to medium. Continue cooking until water evaporates and bottoms are browned and crunchy, 1 or 2 minutes. Transfer to a warm serving dish. Repeat with remaining pot stickers. Serve with dipping sauce.
Notes
You can spike dipping sauce with things like hot sauce, garlic, minced green onions, ginger, etc.From Allrecipes.com
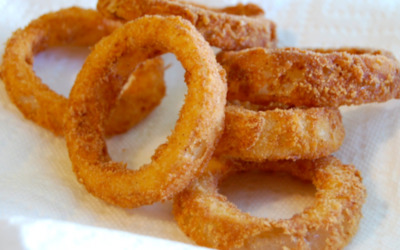
The first known recipe for onion rings appears in a British cookbook written by a chef named John Mollard called The Art of Cookery, Made Easy and Refined. It was published in England in 1802. Surprisingly, Mollard’s early onion rings weren’t all that different from the fried snack we enjoy today! His recipe for “fried onions,” as he called them, involved dipping half-inch-thick onion slices in batter, frying them in lard, and serving them with a side of mustard-spiked melted butter.
Peel onions and slice into 1/2" thick rings. Place sliced onions in a large freezer bag with 1 cup of buttermilk and let sit at least 30 minutes turning occasionally.
Preheat oven to 425°F.
Mix buttermilk, eggs and 2 tablespoons of flour until smooth. Set aside.
In a separate bowl, combine Panko Bread Crumbs, olive oil and seasonings.
Remove onions from the ziploc bag and drain well. Place onions in a bag with 1/2 cup of flour and shake to coat.
Separate the Panko mixture into 2 small bowls. One by one, dip each onion into the egg mixture and then into the Panko mixture to coat.
Place on a parchment lined pan. Bake 10 minutes, flip over and bake an additional 10-15 minutes until browned and crispy.
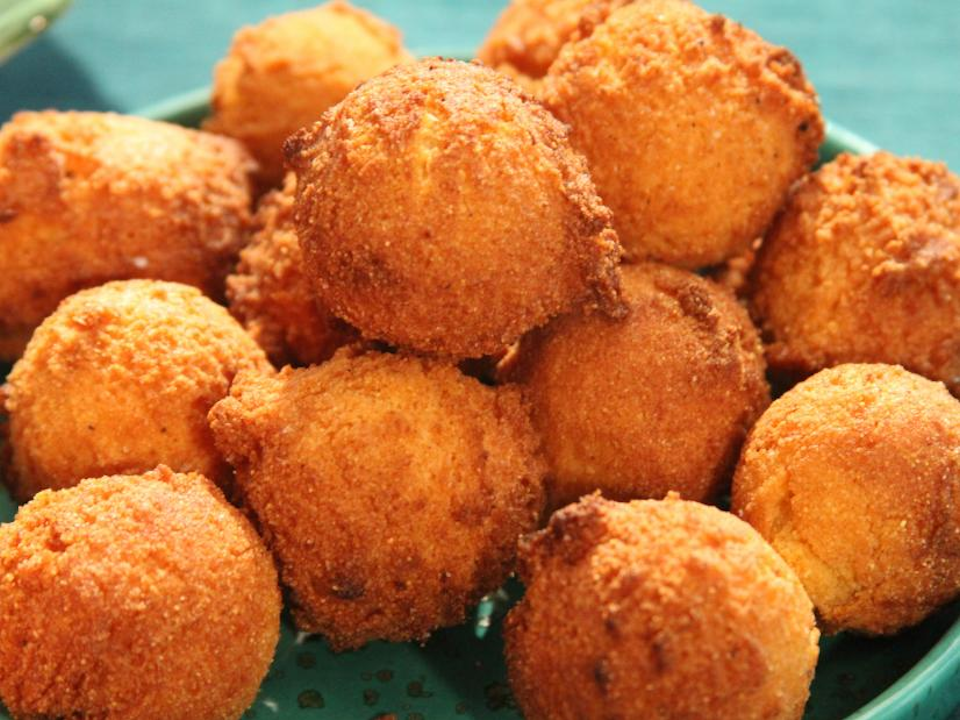
A deep-fried or baked ball of cornmeal batter and spices, usually served as a side dish. They are believed to have originated in the southern United States, where they are a traditional dish.
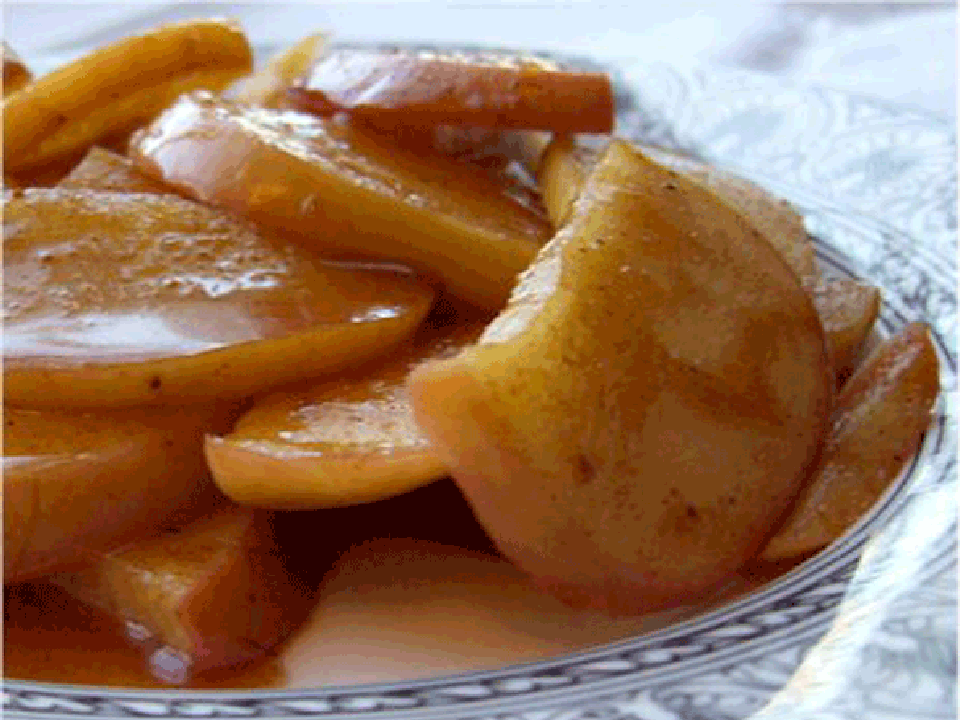
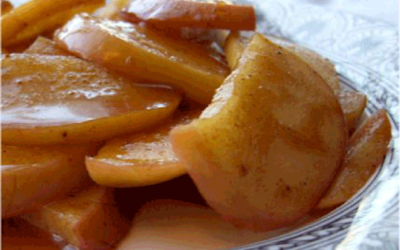
According to FoodandWine.com, Candymaker William W. Kolb supposedly invented them in 1908 in New Jersey. He was trying to sell cinnamon candies for Christmas when he decided that dipping apples in the candy would be a fantastic way to showcase the candy.
Toss together the apples, brown sugar, cinnamon, and nutmeg in a large zip-loc bag to coat the the apples.
cook the apples with 2 tbsp of water and 1 tbsp of butter in a medium saucepan over medium heat. Stirring occasionally about 8 to 10 minutes or until the apples are tender,